Cabinets see a lot of wear and tear on a daily basis, so cabinet paint is designed to be more durable than wall paint. A satin finish is easy to clean and holds up well against sunlight, while semi-gloss or gloss offers even more durability.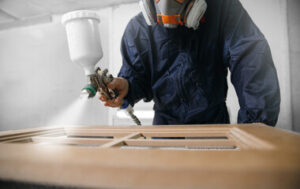
Before you start painting, make sure all surfaces are dust-free. This will help your paint adhere and give you a smooth, professional finish. For professional help, contact Cabinet Painting Sacramento.
When painting cabinets, the type of primer you use is as important as the paint color. Primer helps the paint adhere to the surface and seals it from moisture. It also provides a smooth base for a more even finish. When selecting a primer, make sure it is compatible with the type of paint you will be using (latex or oil) and your desired aesthetic.
Whether your cabinet doors are wood or painted, it’s important to clean them thoroughly before applying any new products. The best way to do this is with a degreaser, such as Krud Kutter, or TSP. This will remove any grease, dust, and grime from the surface. It’s also important to let the surface dry completely before moving on to priming.
If you’re planning on using an oil-based paint, choose a stain-blocking primer to prevent old stains from bleeding through the new coat of paint. These blemishes aren’t only eyesores; they can also weaken the adhesion of your new paint, causing it to chip and peel more quickly.
A good primer also fills in small imperfections, making your cabinets look brand new and creating a smooth canvas for the final paint application. This is especially important on older cabinets with dings and scratches, as they can show through the finished product.
Depending on the condition of your cabinets, you may need to lightly sand them before applying primer. This will roughen the surface, giving the primer a better grip on the cabinets and helping it cover any flaws. Be careful not to sand too much, as you could end up removing too much of the original cabinet finish. When sanding, always move the sander in the same direction as the grain.
Repair
Cabinet painting can be time consuming and labor intensive, but if you have a good plan for prepping and applying multiple coats, the results can look beautiful. However, painting cabinets doesn’t address underlying structural or functional issues. This means that if you have a major problem with your cabinets, such as mold, loose hinges or drawer slides, or cracks and chips in the wood, refinishing may be a better option than paint.
If you decide to refinish your cabinets, a professional will prepare the wood by cleaning and sanding, then stain or apply a clear coat to seal the finish and protect the wood from future damage. Staining is a messy process, and color selection can be challenging. It’s important to have an expert help you choose the right stain and apply it correctly, so your cabinets look great.
Loose or cracked hinges and drawer slides can be repaired by tightening screws or adjusting the position. Cracks in wood can be fixed with wood glue or epoxy. Minor scratches, chips or dents can be filled with wood filler and sanded smooth. Lastly, you can touch up with a color-matched marker or paint to make the repair almost undetectable.
A kit with wood-repair markers is available at most home improvement stores, and they usually include a variety of colors that match the finishes on most natural-wood cabinet doors. Test the markers in an inconspicuous area to ensure that they blend well. After repairing and sanding, you’ll want to wipe the surfaces clean with a damp cloth. A shop vac is ideal for removing heavy dust, but you should also use a tack cloth to remove any residual dirt or debris.
Sanding
Before you can apply primer or paint to your cabinets, you must sand the surfaces. This is a crucial step and helps to create a smooth surface that will allow your finish to adhere well.
Begin with a coarse-grit sandpaper, such as 80 or 120 grit. Then, move to a finer-grit sandpaper to refine the surface and remove any bumps and rough areas. Be sure to check your progress and keep an eye out for any areas that require additional attention, such as deep scuffs or gouges. If you see these imperfections, use a wood filler to correct them and let it dry per the manufacturer’s instructions before moving on.
A power sander makes this job much easier and faster. However, you should be careful not to sand too aggressively because it can damage the surface or leave gouges in your cabinets.
Be sure to use a good quality sander and wear a mask. If possible, you can also apply a liquid deglosser to the cabinetry to break down grease and other grime. This is especially important for the area above a stove, where grease can build up.
Once you’ve sanded the surfaces, wipe them down with a damp cloth to remove any dust. You can also vacuum the cabinets with a shop vac and brush attachment to remove any heavy dust.
You can choose to either roll or brush your cabinetry, but Soloff recommends using both. Rollers are great for larger, flat areas and help the project go a little faster, while brushes provide a better finish and are perfect for corners, details, and crevices. A high-quality brush is also helpful for reducing unwanted textures and creating a smooth finish on your cabinets.
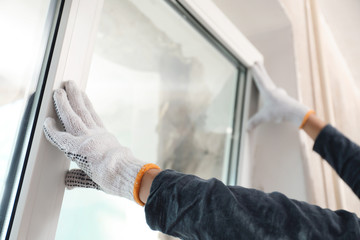
Masking
The natural pores and textures of wood surfaces can make it challenging to hide their appearance under a paint job. When it comes to cabinet painting, the use of a grain filler can be used to minimize this challenge and create a smooth canvas for proper priming and paint application.
Once the grain filler has had time to dry, a putty knife or plastic scraper can be used to remove any excess from the cabinets’ surface. This is important, as you don’t want any extra to be sanded off once the final coat of paint is applied.
It’s also a good idea to label where the hardware will need to be reattached. This will help you avoid the common mistake of misplacing handles and other hardware. You can then cover the cabinet boxes and countertops with painter’s tape to protect them from any accidental smudges or drippings of the new paint. Finally, a good degreaser can be used to help clean the cabinet surfaces and a final cleanse using acetone cleansing wipes will ensure they’re ready for the next step.
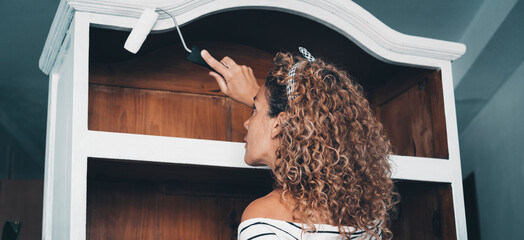
Painting
Painting cabinets can be a large undertaking. It’s important to take the time to do it well so you can enjoy your new look for a long time. There are a few key steps to follow that will help you get the best results.
First, make sure all surfaces are clean. Cabinets can build up grease over the years, and paint will not adhere to greasy surfaces. You should use a de-greaser or a cleaner such as distilled vinegar to wipe down all surfaces that will be painted. This is also the time to patch any cracks or holes with spackle or wood filler if needed. Sand the surface afterward to scuff it up and prepare it for primer and paint.
Next, you’ll want to mask off areas where the doors and drawers will be removed, using tape and brown contractor’s paper for countertops or a high-density plastic drop cloth for flooring. The last thing you want is to get a glob of paint on the knobs, pulls, hinges, or any other hardware. It is a good idea to number the doors and drawers as you remove them, so you know where they go when it comes time to reinstall them. This will save you a lot of frustration and hassle down the road.
Finally, you’ll want to apply your chosen color. Cabinet paint has special resins in it that help it resist staining and scratches, so you’ll want to choose a quality brand. It may be more expensive than regular wall paint, but it’s worth the extra cost. You’ll also want to consider a polycrylic sealer to protect your work.
Adding metallic spray paint to the hardware can give your new finish a real pop. Be sure to use a high-quality, fast-drying spray paint, such as KILZ 3(r) PREMIUM.